> ## Documentation Index
> Fetch the complete documentation index at: https://docs.maildiver.com/docs/llms.txt
> Use this file to discover all available pages before exploring further.
# Step 3: Manage your account
> Create an organization and an account
One of the use cases of the root account is to create the organization, environment, users, and permissions. Then we will use the user to continue with the rest of the documentation and not use the root account anymore.
## 1. Create an organization and an account
Go to [AWS Organization](https://us-east-1.console.aws.amazon.com/organizations/v2/home?region=us-east-1) in the AWS console to create an organization. It's not region specific, so all the regions are disabled and shown as **global**. AWS organization is used to manage the accounts. We will create an account for deployment.
If you have bought a gold edition of MailDiver, it means that you have access
to the source code. If you want to develop new features, it's better to create
another account - dev account to safely experiment with the code.
a. Click **Create an organization** button.
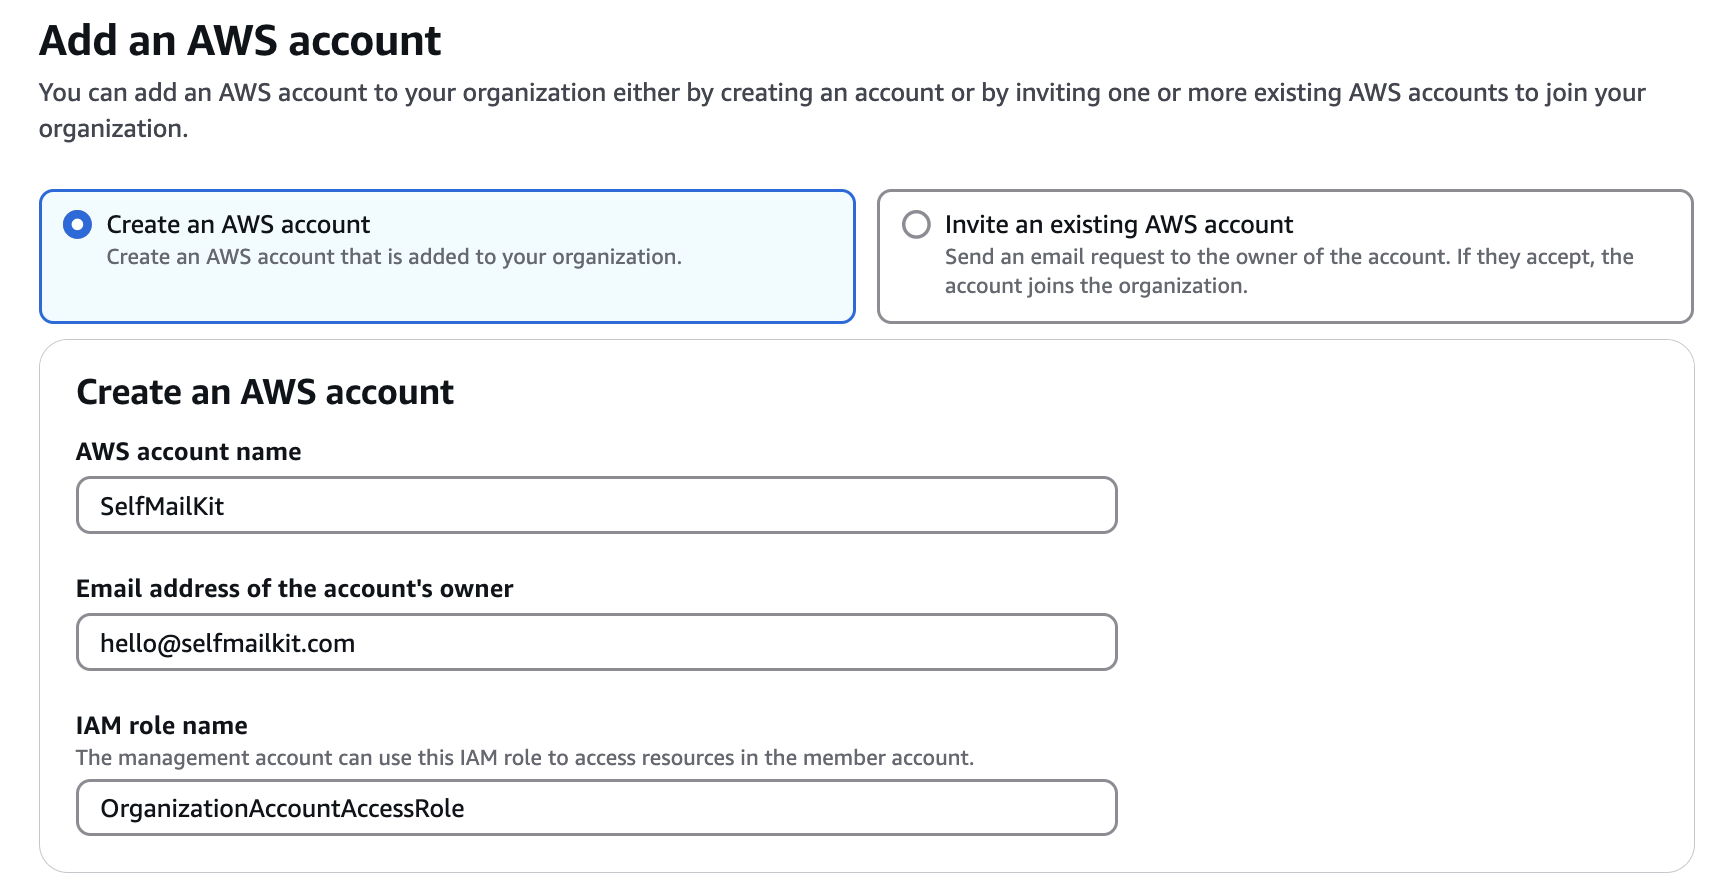
b. After it's created. Click the **Add account** button.
c. Fill in the fields. Leave the IAM role name as default - `OrganizationAccountAccessRole`. Click **Create** button.
 ## 2. Create permission sets
Now we will create permission sets. Go to [IAM identity center](https://us-east-1.console.aws.amazon.com/singlesignon/home/) in the AWS console.
a. Choose a region. In AWS, The services typically are region specific. It's essential to choose the correct region before creating any resources. You should decide which region you want to use. Generally, you should select the region geographically close to you or your users. If your users are globally distributed, don't worry. We use AWS CloudFront to cache the content (APIs, assets, frontend app, etc.) and serve it from the nearest edge location for both frontend and backend infrastructure.
b. Click the **Enable** button.
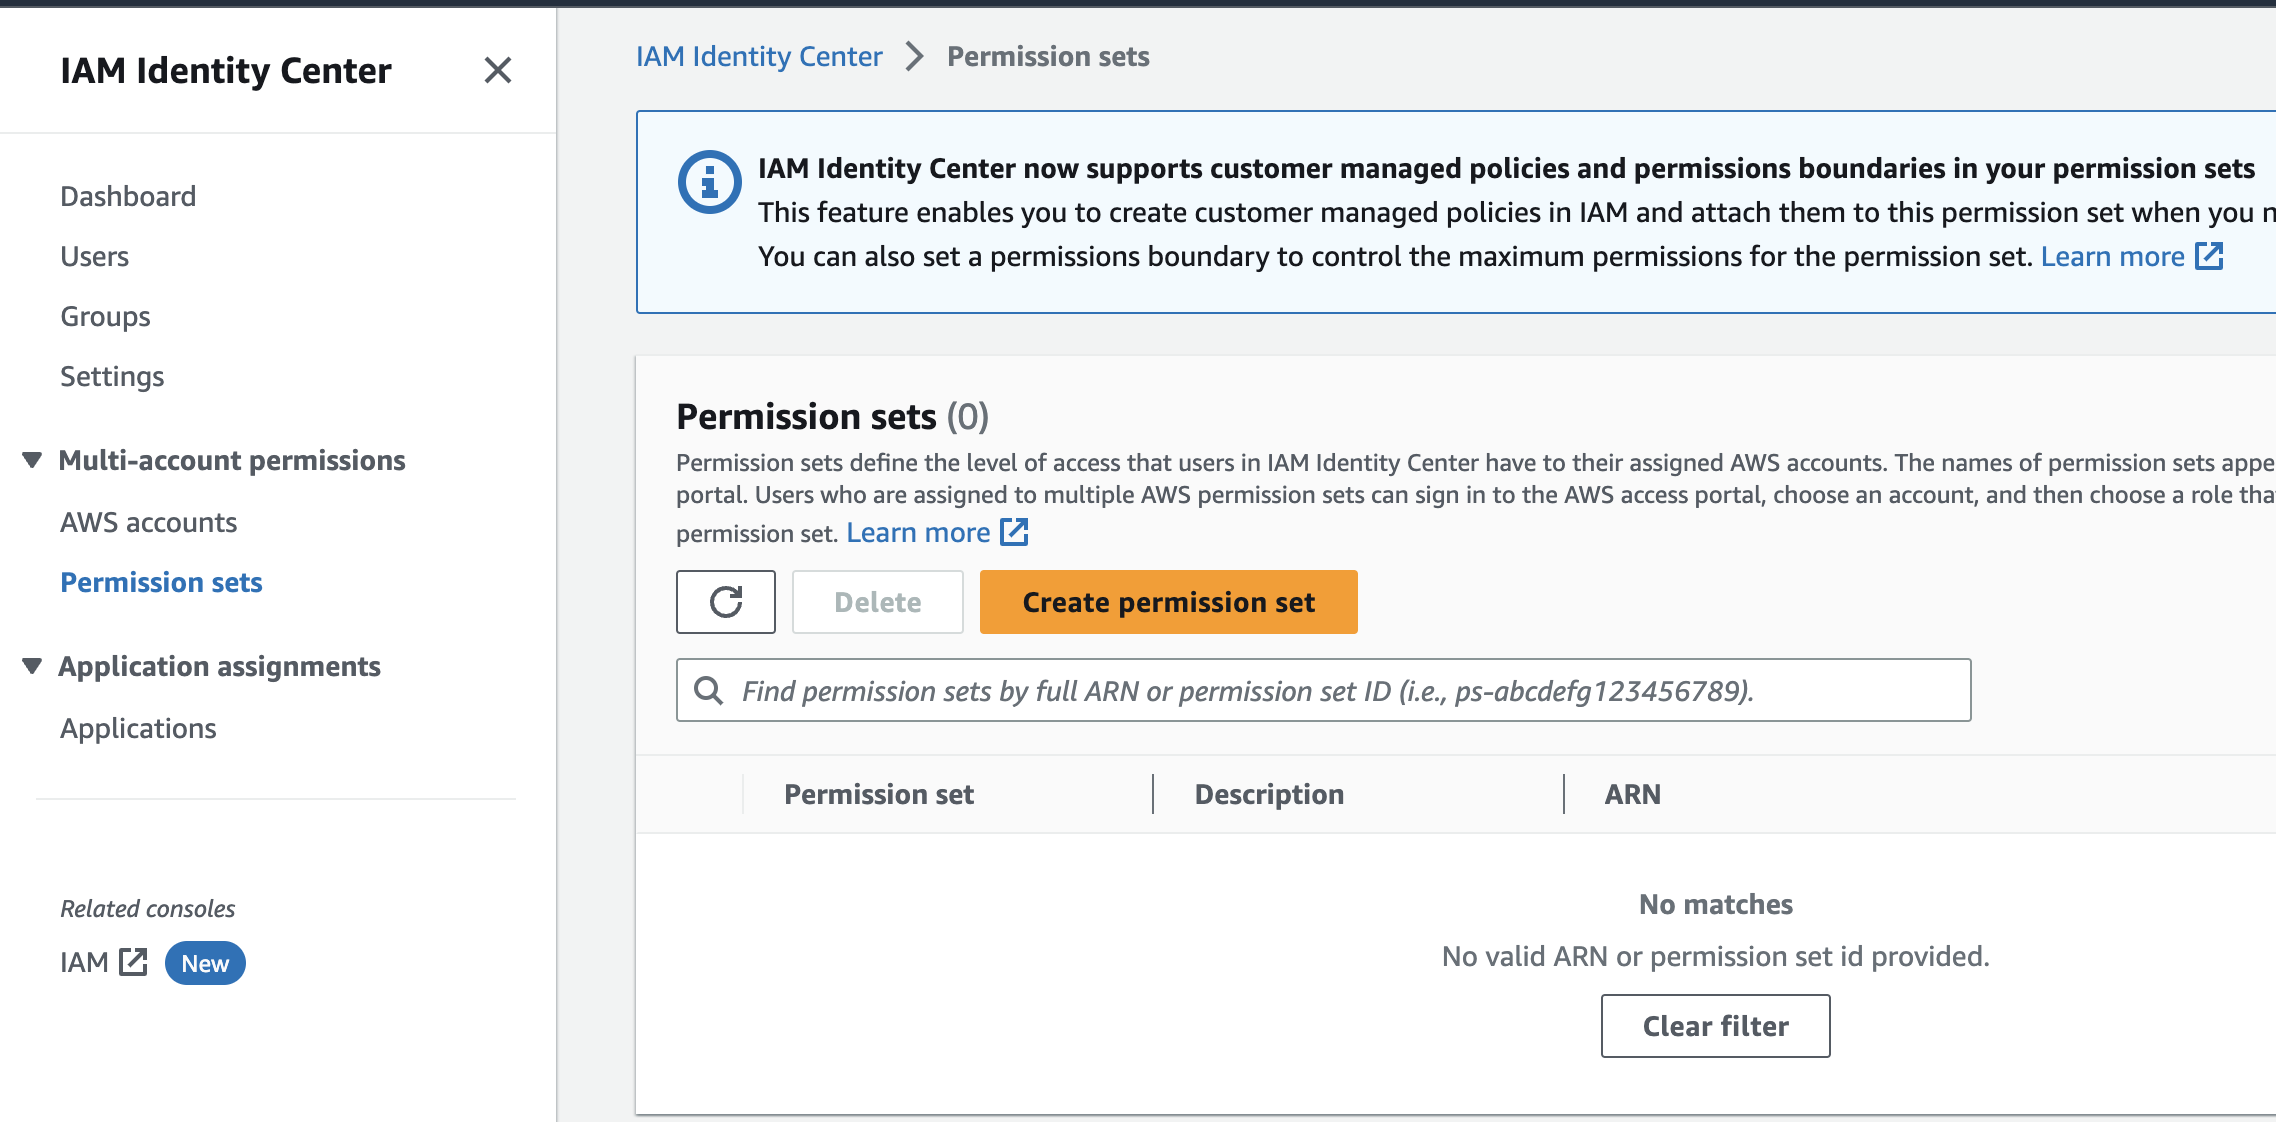
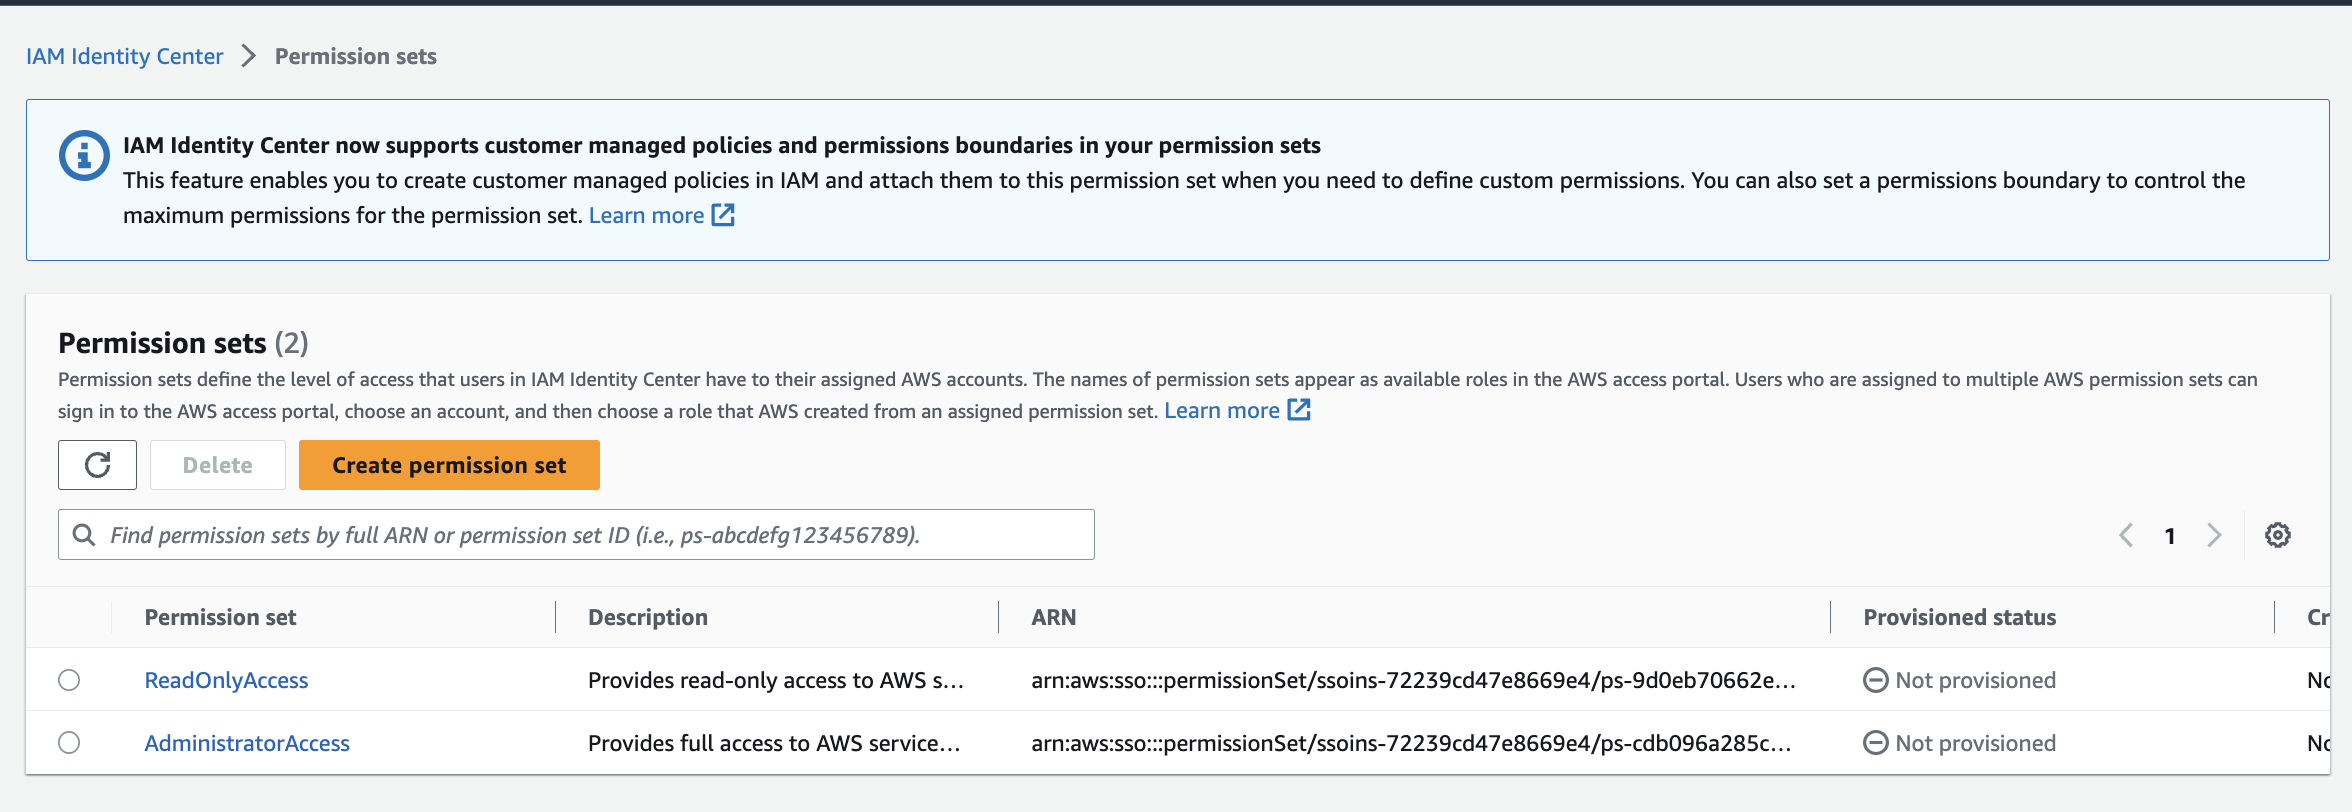
c. On the left side, click the **Permission sets** button under the Multi-account permissions section, then click **Create permission set**.
## 2. Create permission sets
Now we will create permission sets. Go to [IAM identity center](https://us-east-1.console.aws.amazon.com/singlesignon/home/) in the AWS console.
a. Choose a region. In AWS, The services typically are region specific. It's essential to choose the correct region before creating any resources. You should decide which region you want to use. Generally, you should select the region geographically close to you or your users. If your users are globally distributed, don't worry. We use AWS CloudFront to cache the content (APIs, assets, frontend app, etc.) and serve it from the nearest edge location for both frontend and backend infrastructure.
b. Click the **Enable** button.
c. On the left side, click the **Permission sets** button under the Multi-account permissions section, then click **Create permission set**.
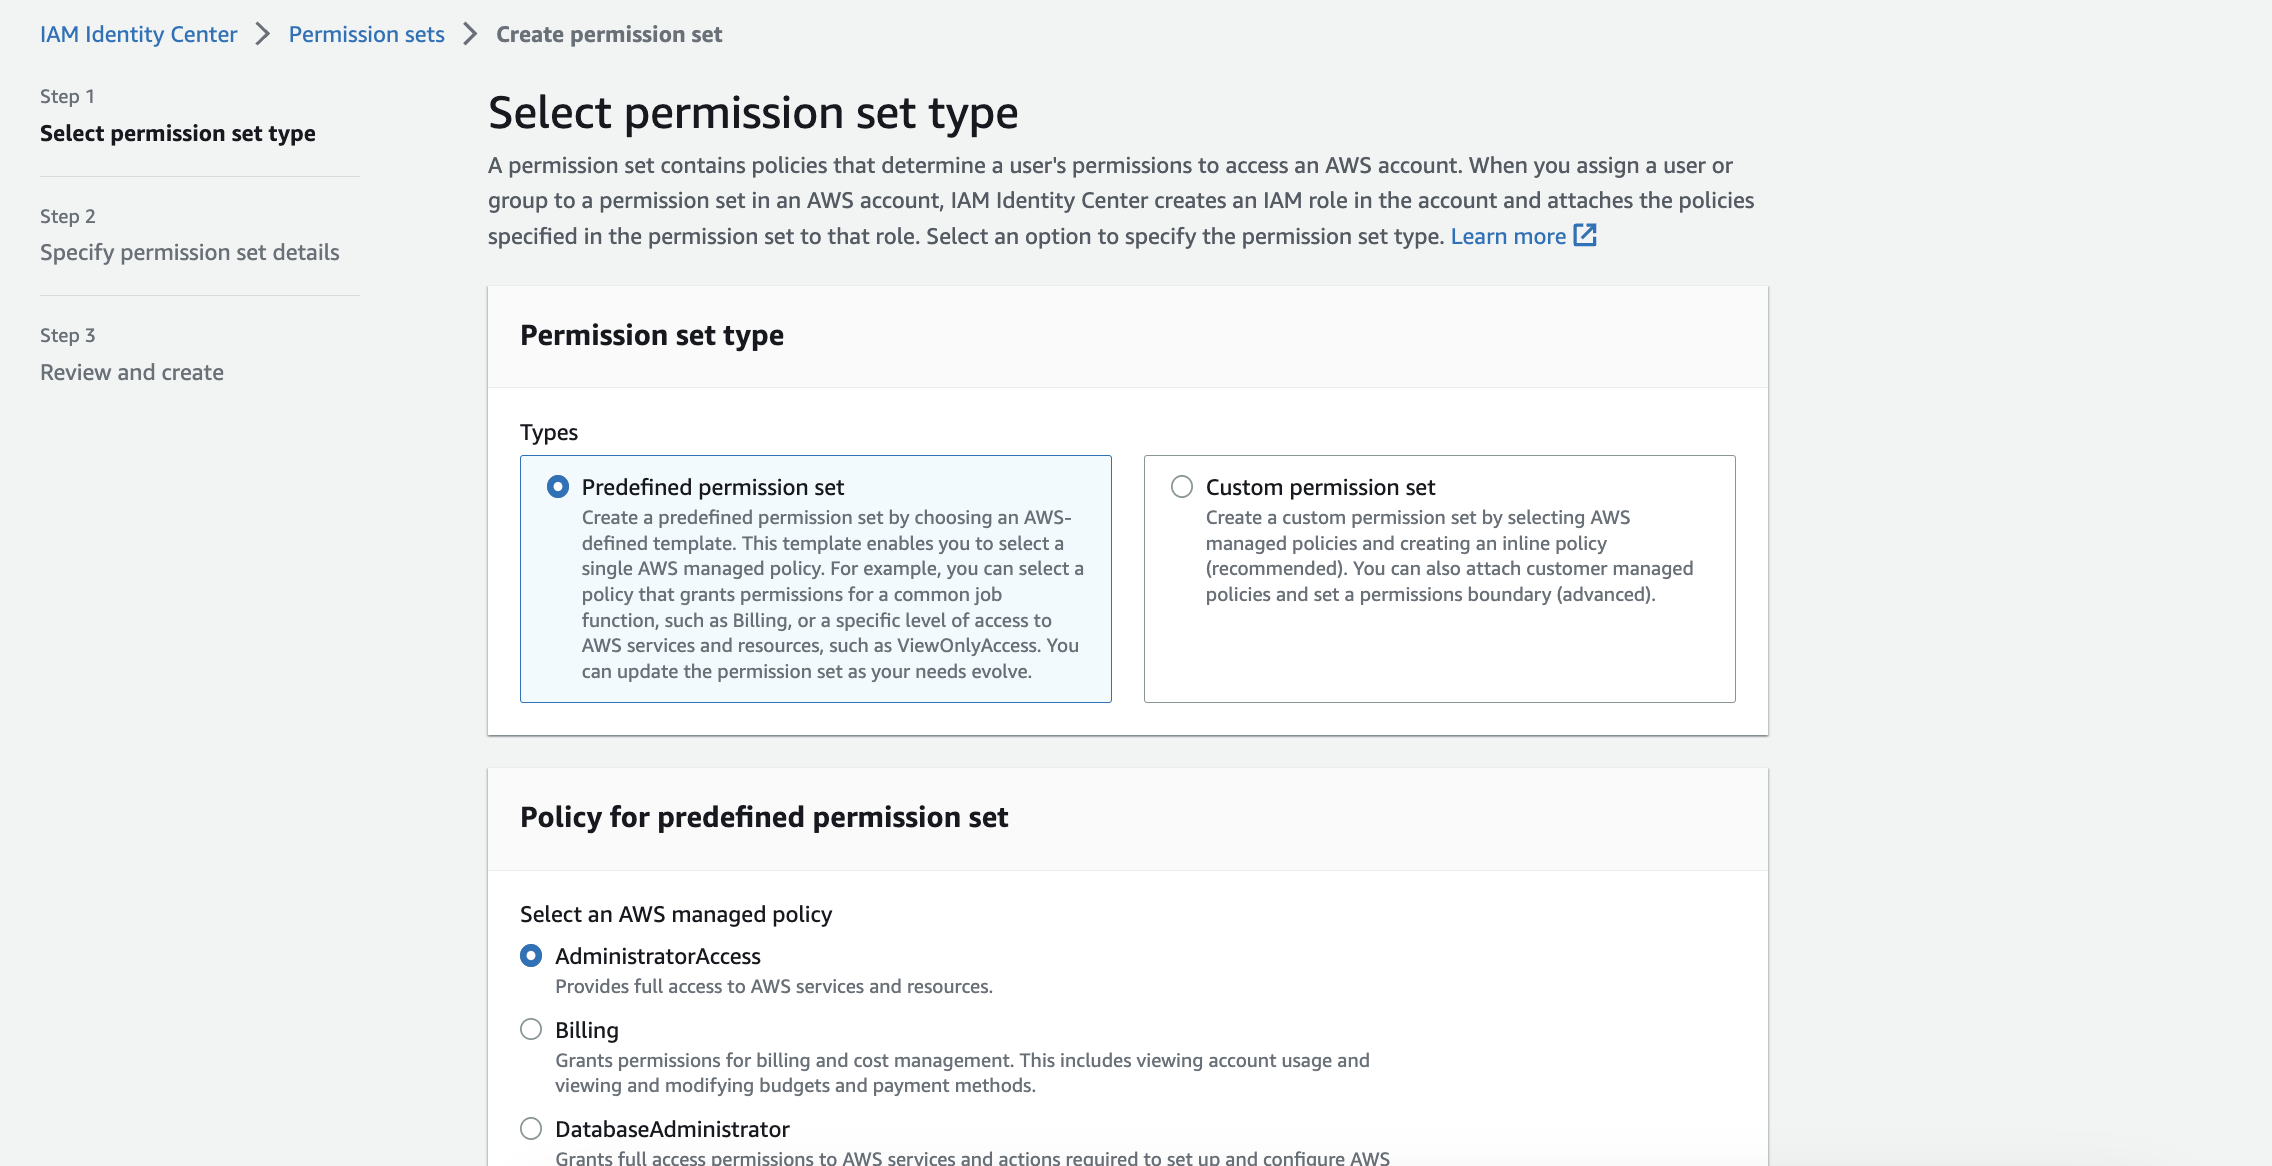
 d. We will create two predefined permission sets: `AdministratorAccess` and `ReadOnlyAccess`. First, let's create `AdministratorAccess`. Choose default **Predefined permission set**.
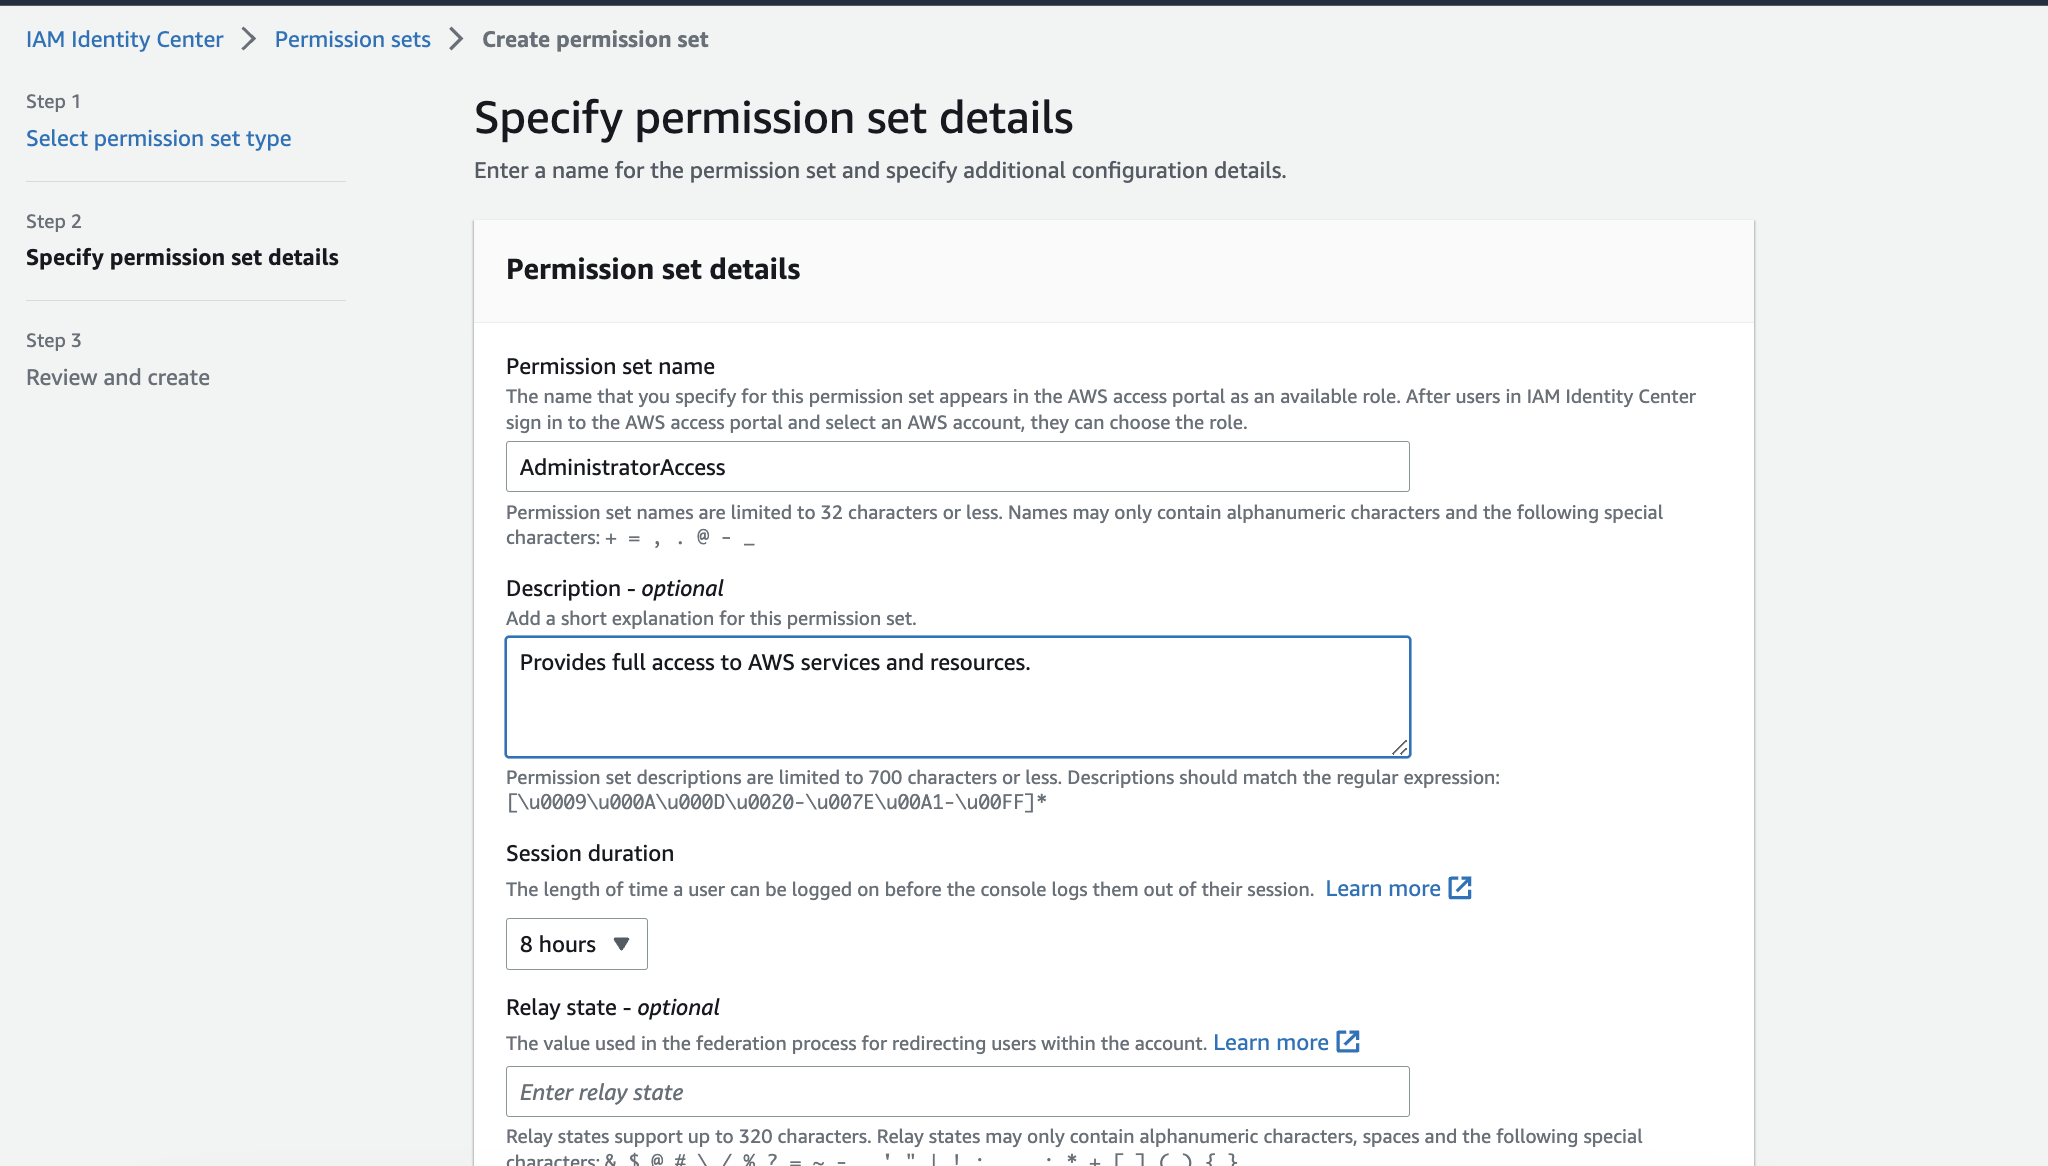
 e. In step 2, Keep `AdministratorAccess` as default. Add a description if you want. For session duration, choose how often you want to re-login. Click the **Next** button, review, then click the **Create** button.
 f. Repeat the same steps for the `ReadOnlyAccess` permission set. You should have two permission sets: `AdministratorAccess` and `ReadOnlyAccess`.
 ## 3. Create a group and a user
Lastly, we need to create a group and a user. Groups are convenient for managing multiple users. For example, Instead of assigning permissions one by one for the users, you can assign the permissions to the group, and all users in the group will have the same permission sets.
a. On the left side, click **Groups** and then click the **Create group** button.
## 3. Create a group and a user
Lastly, we need to create a group and a user. Groups are convenient for managing multiple users. For example, Instead of assigning permissions one by one for the users, you can assign the permissions to the group, and all users in the group will have the same permission sets.
a. On the left side, click **Groups** and then click the **Create group** button.
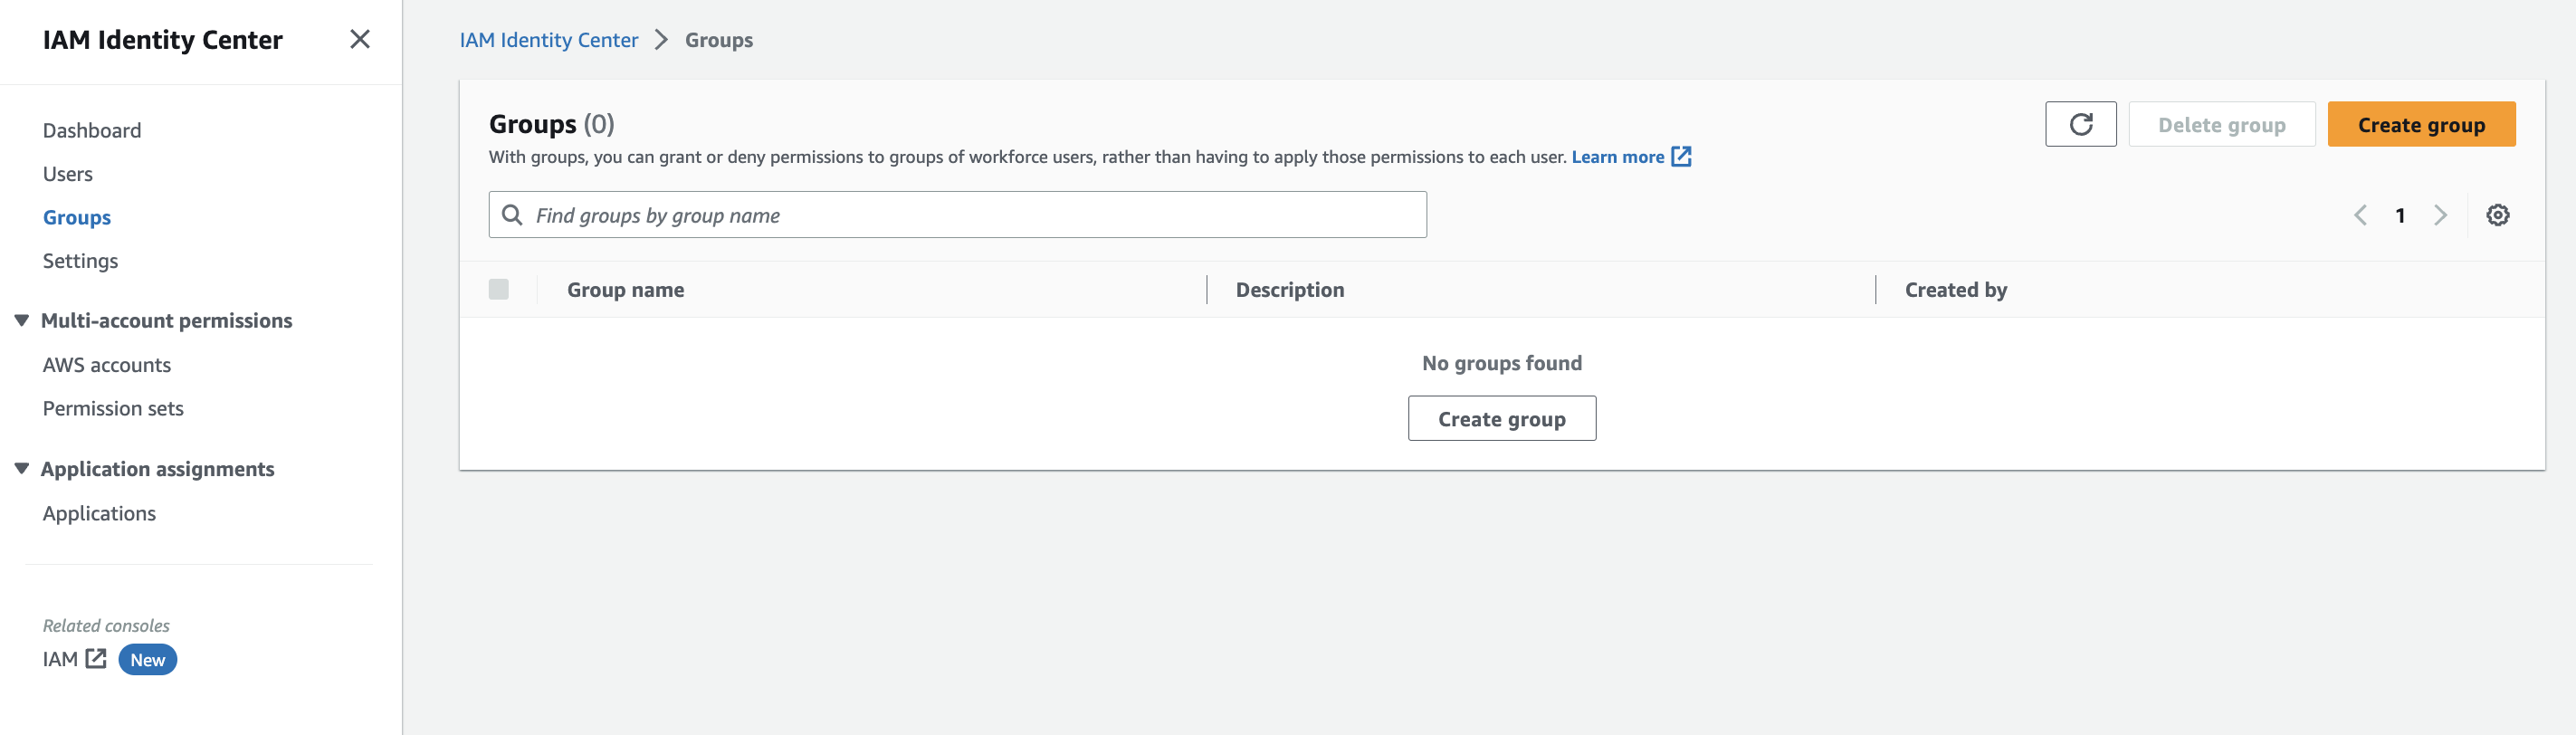 b. Enter a group name `FullAccessGroup`. Feel free to add any descriptive name you want. Skip creating a user in this step. Click the **Create group** button.
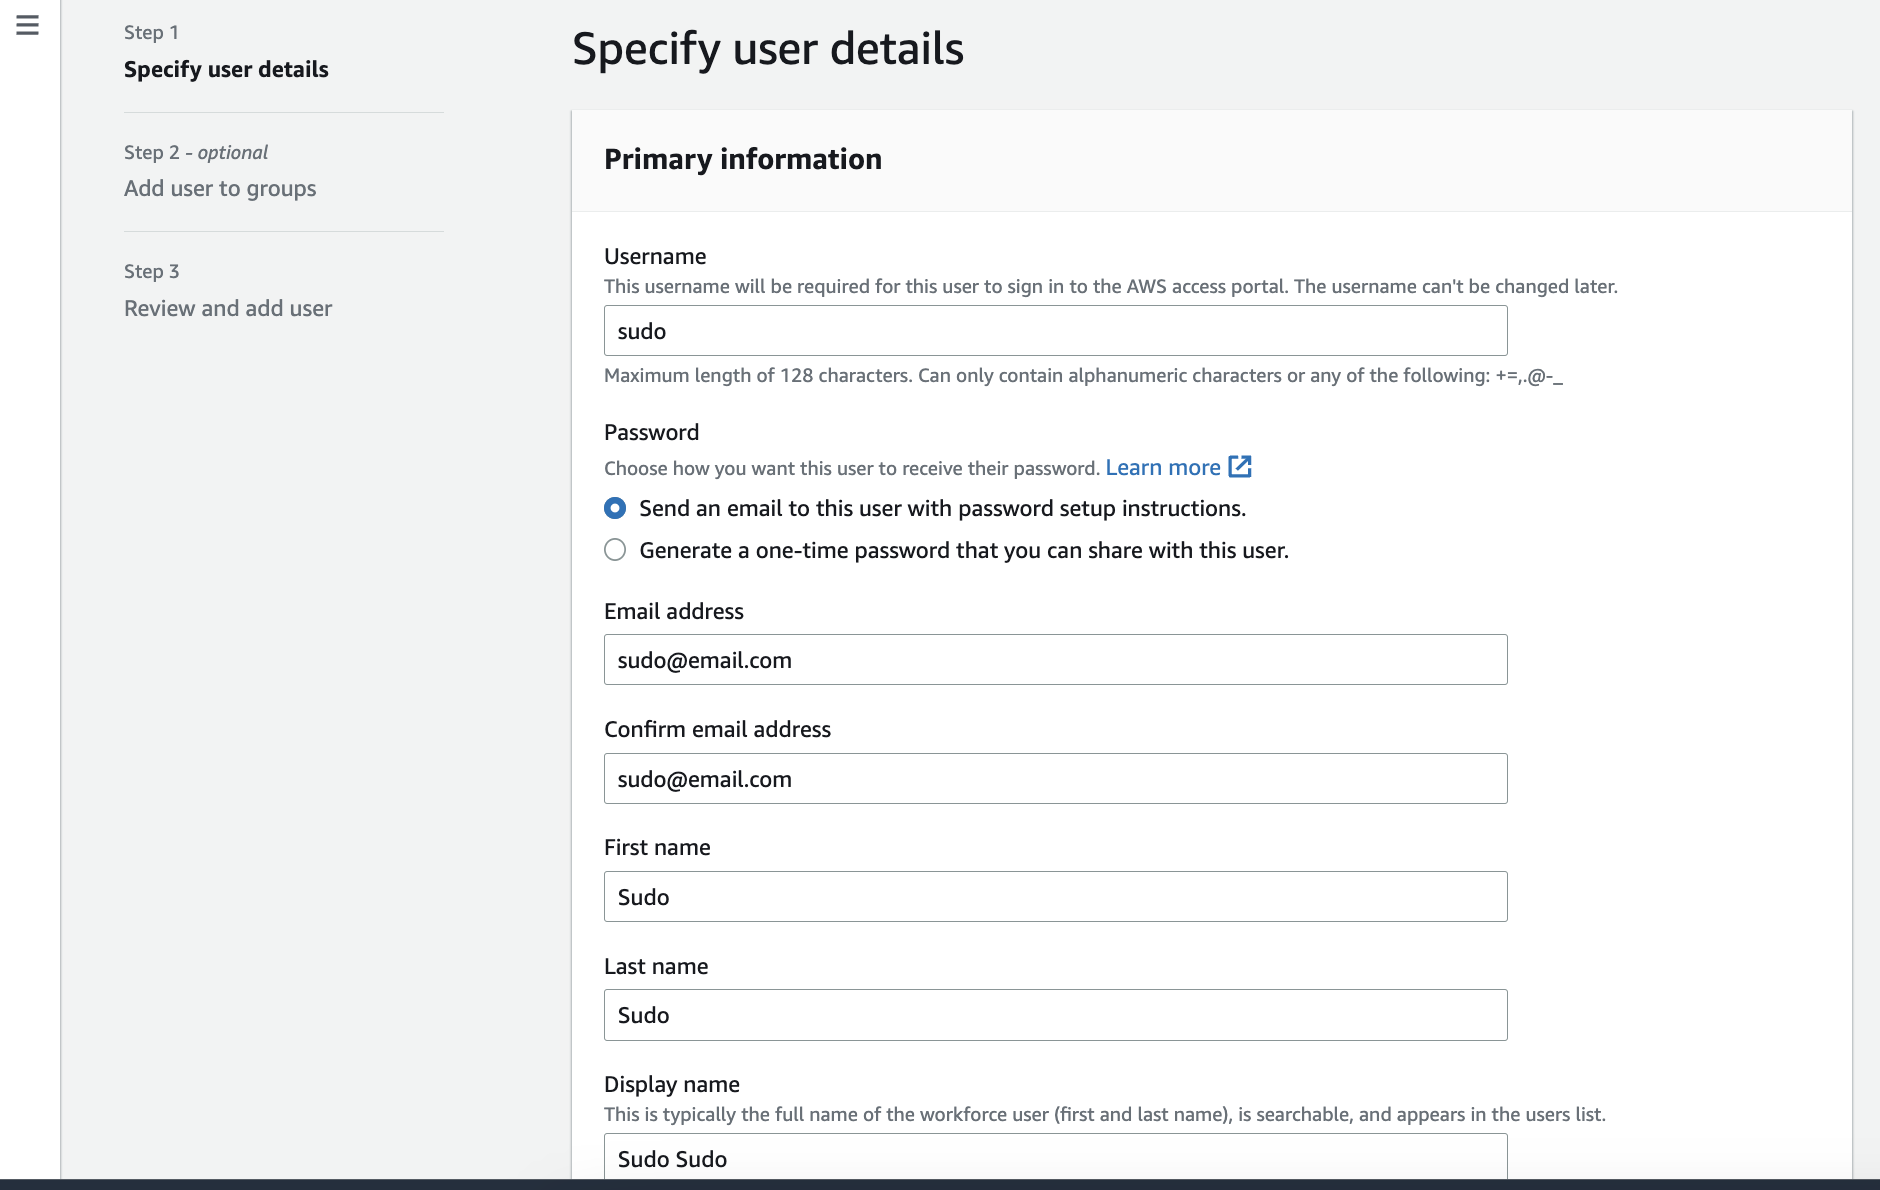
c. On the left side, click **Users** and then click the **Add user** button. You will use this user for deployment. You will be asked to create a password and log in with the username. I'll use `sudo` since it's my cat's name. Choose `Send an email to this user with password setup instructions.` for the password.
Enter your email address and full name. You can either leave the rest of the fields as default or fill them in. Click the **Next** button.
b. Enter a group name `FullAccessGroup`. Feel free to add any descriptive name you want. Skip creating a user in this step. Click the **Create group** button.
c. On the left side, click **Users** and then click the **Add user** button. You will use this user for deployment. You will be asked to create a password and log in with the username. I'll use `sudo` since it's my cat's name. Choose `Send an email to this user with password setup instructions.` for the password.
Enter your email address and full name. You can either leave the rest of the fields as default or fill them in. Click the **Next** button.
 d. Select the group we created earlier, `FullAccessGroup` and click the **Next** button. Review and click the **Add user** button.
e. You will get an email from AWS with the login instructions. You will use this user to deploy MailDiver. Again, please avoid using the root account for day-to-day tasks.
## 4. The final step, add the user to the account.
As a final step, we must add the user to the account.
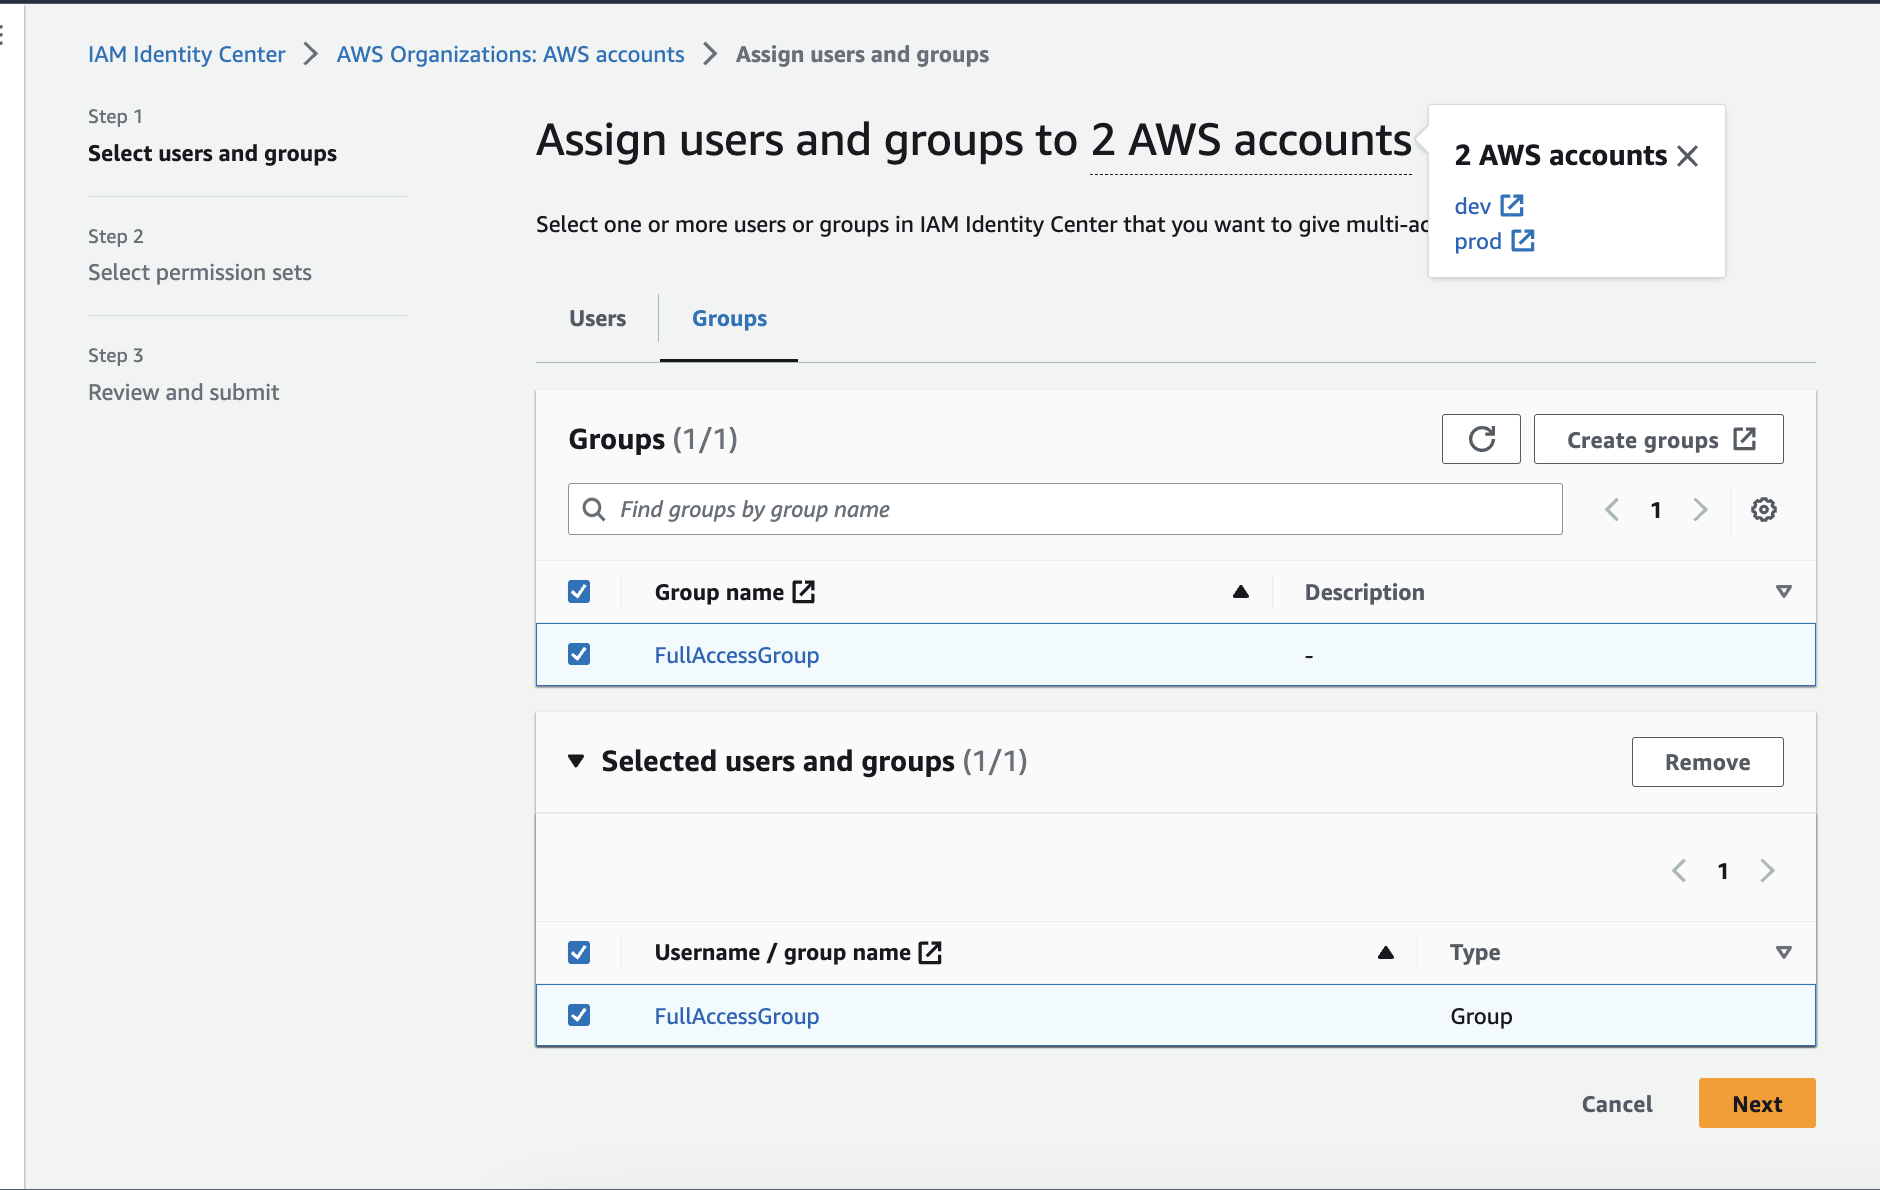
a. In [IAM identity center](https://us-east-1.console.aws.amazon.com/singlesignon/home/) page, click **AWS accounts** on the left side under the Multi-account permissions tab. Select the account and click the **Assign users or groups** button.
b. Select the group (not the user) we created earlier, `FullAccessGroup` and click the **Next** button.
d. Select the group we created earlier, `FullAccessGroup` and click the **Next** button. Review and click the **Add user** button.
e. You will get an email from AWS with the login instructions. You will use this user to deploy MailDiver. Again, please avoid using the root account for day-to-day tasks.
## 4. The final step, add the user to the account.
As a final step, we must add the user to the account.
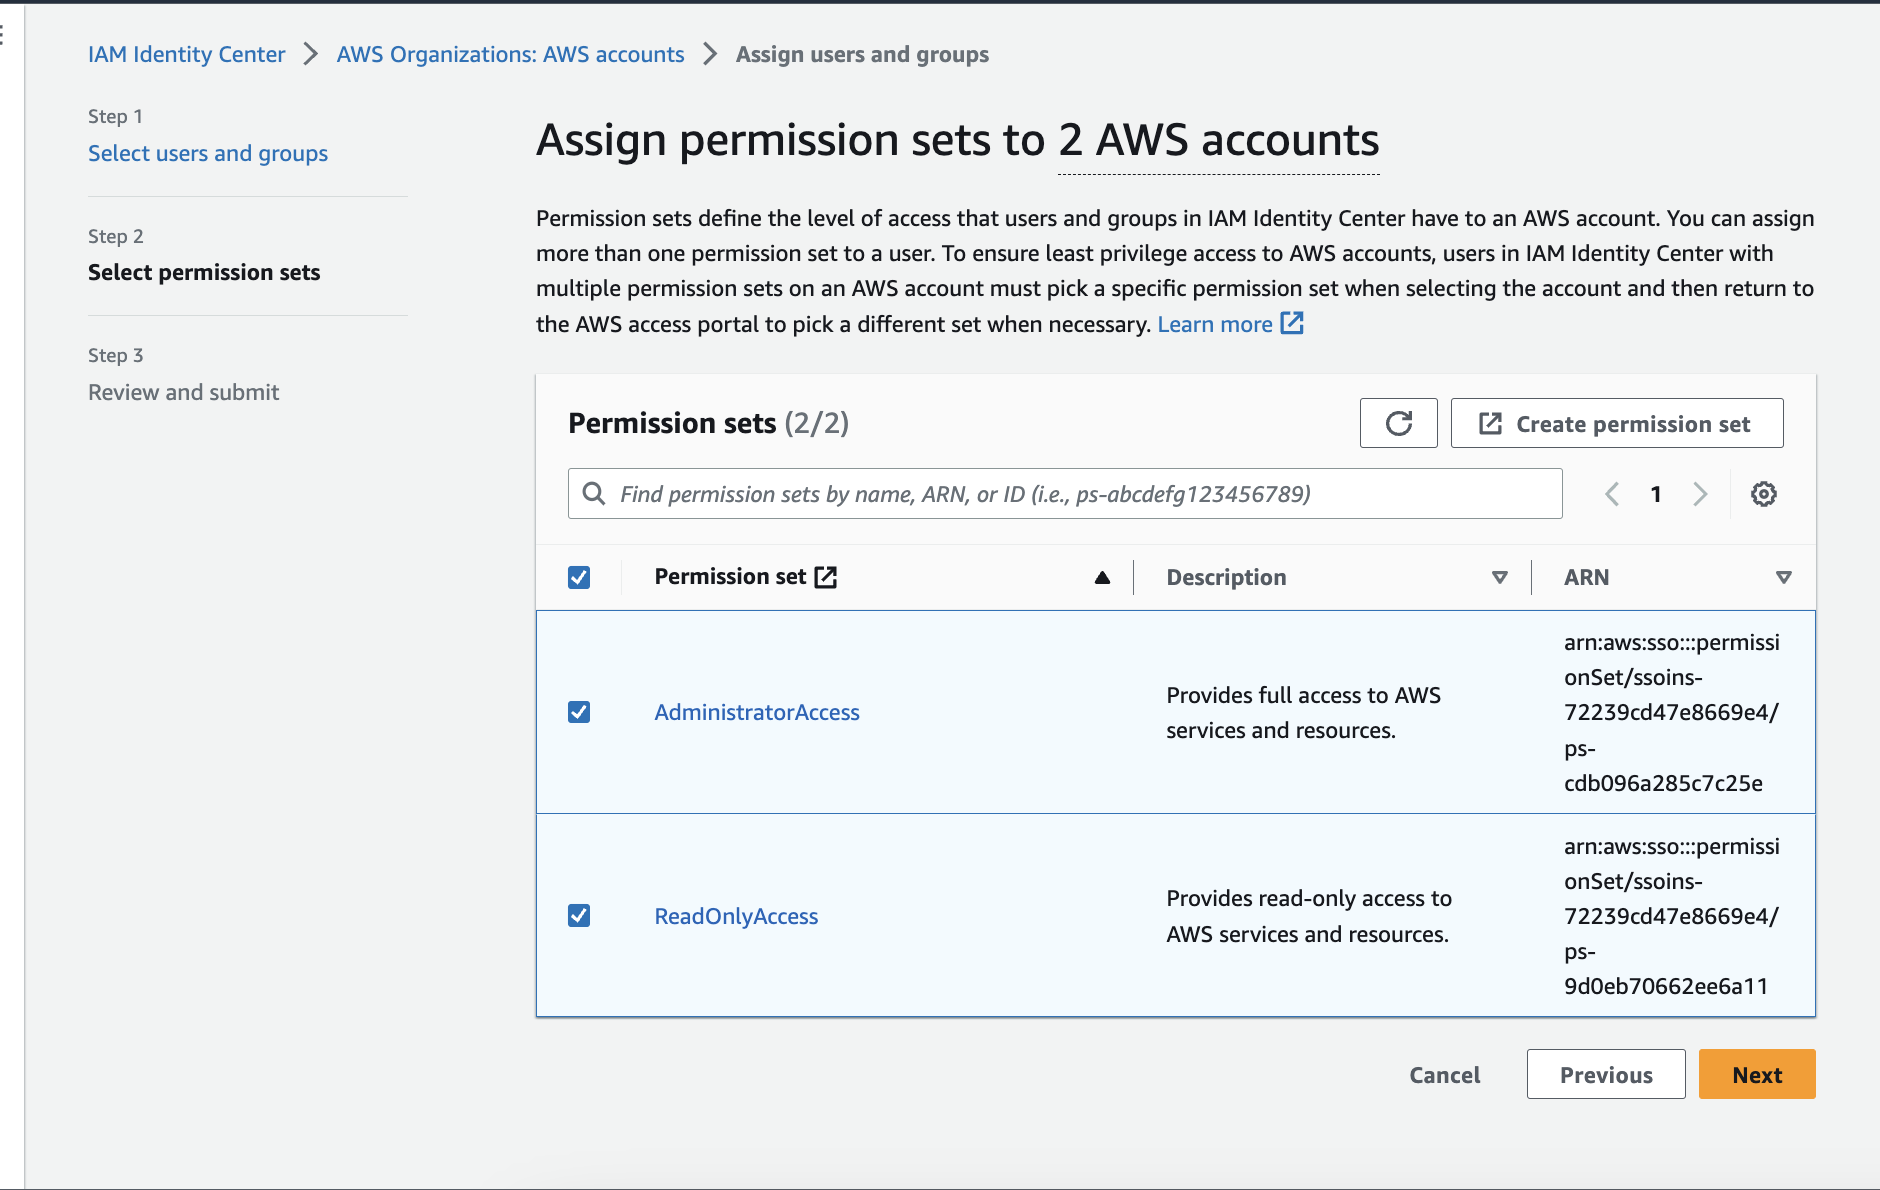
a. In [IAM identity center](https://us-east-1.console.aws.amazon.com/singlesignon/home/) page, click **AWS accounts** on the left side under the Multi-account permissions tab. Select the account and click the **Assign users or groups** button.
b. Select the group (not the user) we created earlier, `FullAccessGroup` and click the **Next** button.
 c. In step 2, select the permission sets `AdministratorAccess` and `ReadOnlyAccess`. Click the **Next** button, review, and submit.
 That's it! Everything is set up and ready to deploy MailDiver with one command!
If you need help to access for SES production access, please follow the steps below:
[Request production access for SES](/self-hosted/how-to-deploy/aws-ses-production-access)
That's it! Everything is set up and ready to deploy MailDiver with one command!
If you need help to access for SES production access, please follow the steps below:
[Request production access for SES](/self-hosted/how-to-deploy/aws-ses-production-access)